Configure Azure AD User Directory
This page covers how to configure Trivore ID authentication to work with Azure AD. Configuring Azure AD itself is out of scope here — only the general requirements are covered.
This lets users sign in to Trivore ID using an existing Azure AD account.
Configure Trivore ID
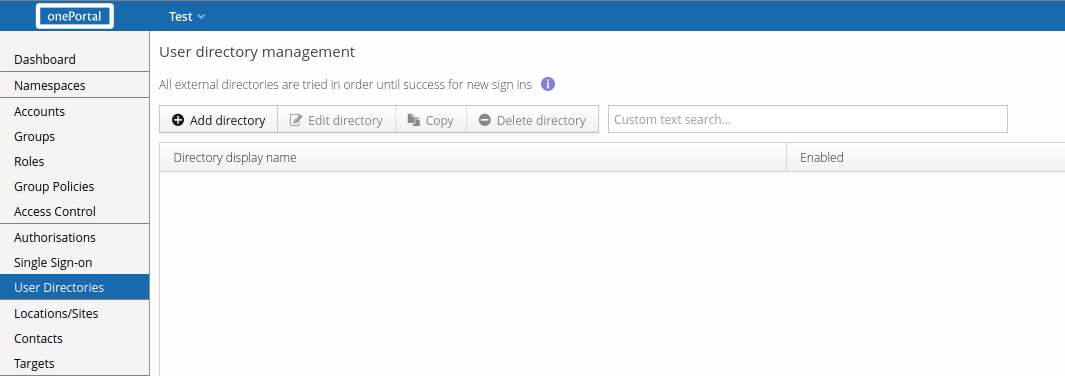
First, select User Directories from the Main Menu and select Add directory.
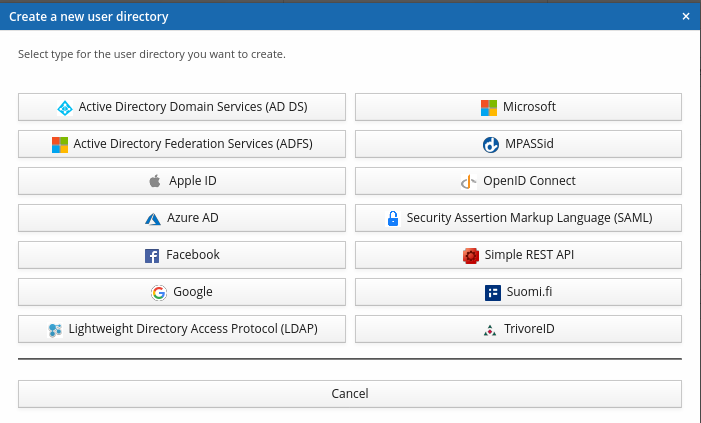
You'll be asked to select a directory type — select Azure AD.
Core settings
Configure the necessary settings, including Name, Tenant, Client ID, and Client secret. Depending on your use case, you may also need to adjust the Scope value — the default provides Trivore ID access to basic Azure AD user information, which is sufficient for most use cases.
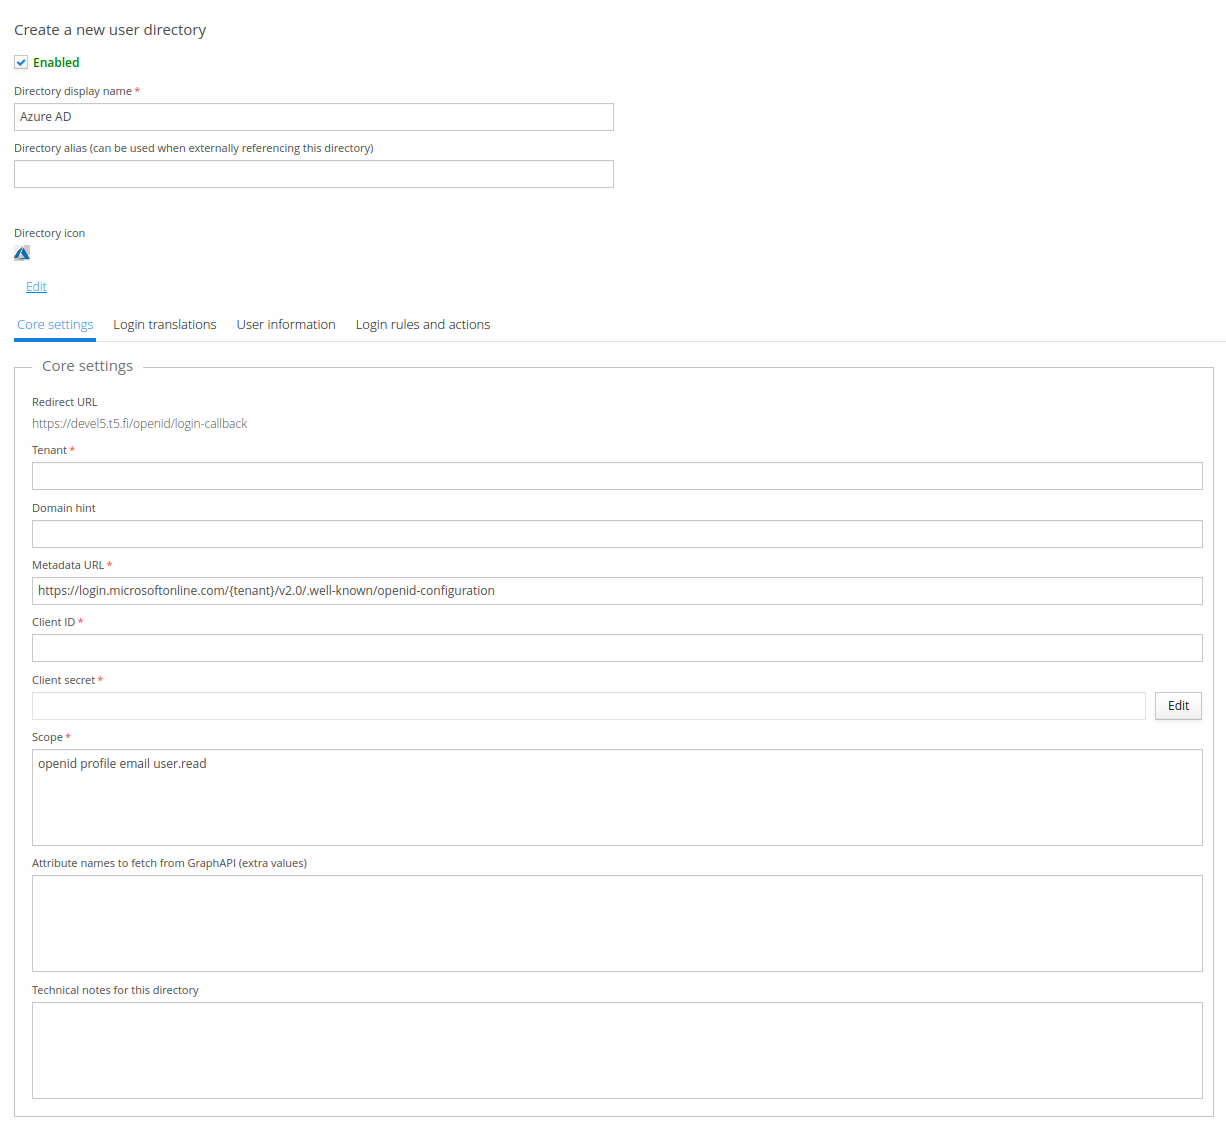
Tenant, Client ID, and Client secret all depend on the service provider (the organisation managing the Azure AD instance you're integrating with) — Azure AD needs to be configured first before these values are available. You'll need the Redirect URL (shown in the screenshot) when configuring Azure AD; note this value differs per Trivore ID instance.
| Field | Description |
|---|---|
| Name | Any name you want for this directory. |
| Tenant | The Azure AD instance's unique identifier. |
| Domain hint | A login domain hint, used to auto-redirect users to an on-premises ADFS if all users belong to a domain that should use it. See Microsoft's documentation for details. |
| Client ID | The OpenID Connect client_id parameter. |
| Client secret | The OpenID Connect client_secret parameter. |
| Scope | Adjust if needed — defines which user information/attributes can be imported. See Microsoft's documentation for appropriate values. |
| Attribute names to fetch from GraphAPI (extra values) | Fetch these user attributes from the Graph API on sign-in. Only needed for a dot-separated mapping such as onPremisesExtensionAttributes.extensionAttribute12 — in that case, this field should contain onPremisesExtensionAttributes. |
User information
Once the core settings are configured, you may need to adjust the user attribute mappings — the defaults are suitable for most cases.
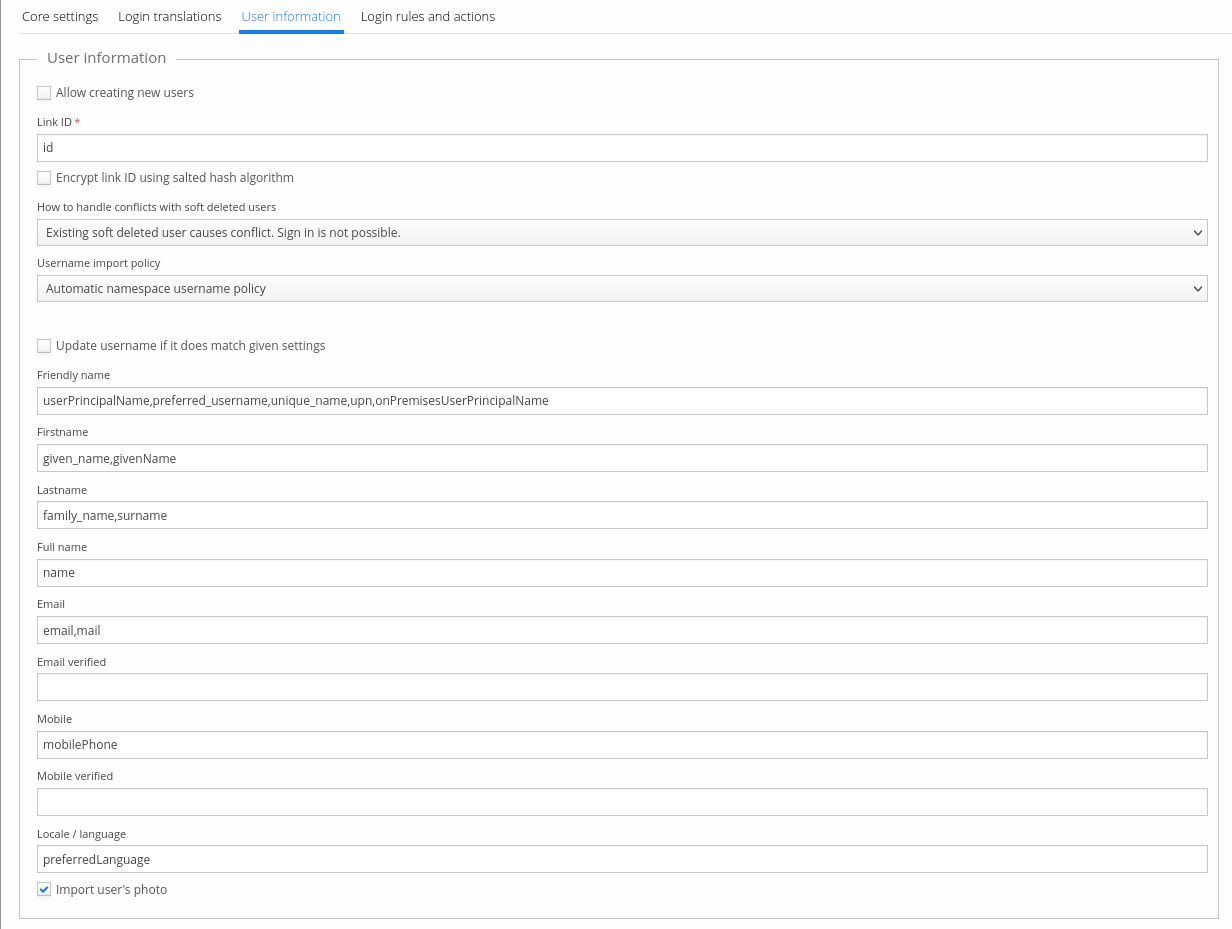
Azure AD uses the common user attribute mappings, plus:
| Field | Description | Default value |
|---|---|---|
| Import user's photo | Import the user's profile photo from Azure AD. | True (checked) |
Group information
Azure AD uses the common group attribute mappings, with some additions.
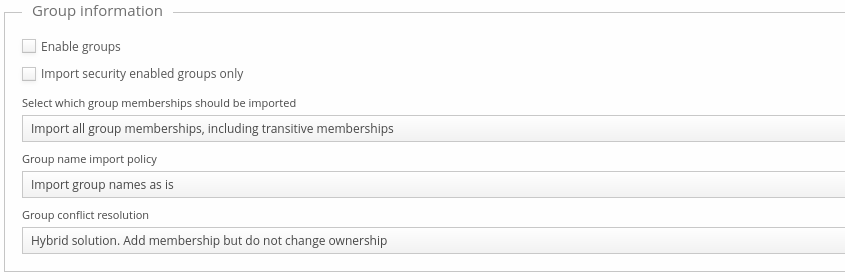
Azure AD-specific fields for group information:
| Field | Description | Default value |
|---|---|---|
| Import security enabled groups only | Import only security-enabled groups from Azure AD (Graph API). See Microsoft's groups overview for details. | False (not checked) |
| Select which group memberships to be imported | Import either direct group memberships only, or all memberships including transitive ones (membership via a nested group). | Import all group memberships, including transitive memberships |