Configuring OP Identity Service Broker
This document provides instructions on how to configure OP Identity Service Broker with Trivore ID.
Prerequisites
- Agreement with Trivore to use OP Identity Service Broker with Trivore ID
- Contact Trivore Sales or your Trivore contact person.
- Agreement with OP to use OP Identity Service Broker
- You will receive a Client ID from OP after the agreement is completed.
IP Identity Service Broker
More information can be found from here: https://www.op.fi/en/corporate-customers/payments-and-cash-management/merchant-services/op-identity-service-broker
In contractual matters, please contact your own OP cooperative bank.
Providing technical information to OP
In order for Trivore ID to connect to OP’s system, you must return the following information to OP using the form template they provide:
| Description | Example | |
|---|---|---|
| Business ID | Company VAT-code | 1234567-8 |
| Company Name | Registered company name | Example Oy |
| JWKS URI | JSON Web Key Set (JWKS) URI | https://my-trivore-id.net/openid/signed-jwks |
| Redirect URL | JSON Web Key Set (JWKS) URI | https://my-trivore-id.net/openid/login-callback |
| OpenID Entity Statement | File that can be downloaded from Trivore ID. Deliver this file to OP. | op-entity-statement-id.trivore.com.jwt |
Create a User Directory in Trivore ID
-
From the main menu, select User Directories and click Add Directory
-
When prompted, select the directory type OP Identity Service Broker.
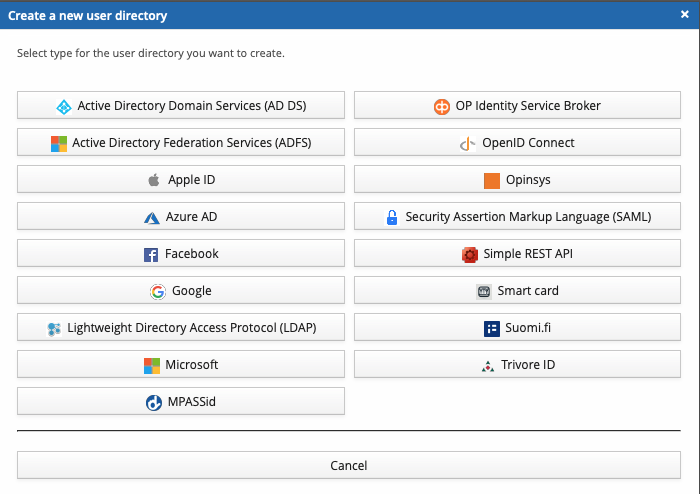
-
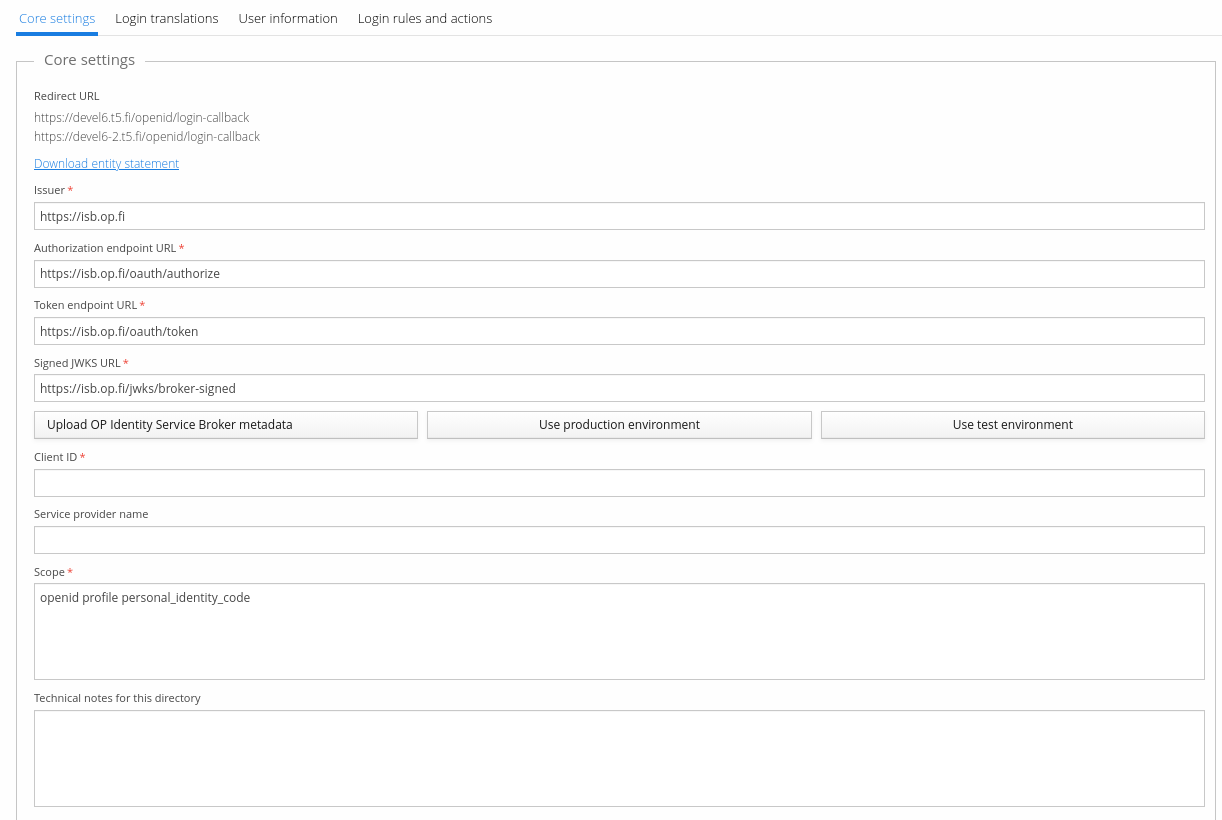
Choose Use production environment to auto-populate the correct parameters.
- Recommendation: use the test environment first to verify your settings with OP.
-
Enter the Client ID you received from OP.
-
Save the User Directory from the top-right corner.
-
Download the Entity Statement and deliver it to OP.
-
Adjust scope value if needed.
Scope is a space separated list of scopes, or basically sets of information requested. This must include "openid" and "personal_identity_code" and can optionally include also "profile", "weak" and "strong". Other scope values are rejected. For example "openid profile personal_identity_code" is accectable. The profile includes name, given_name, family_name and birthdate. If the Service Provider's purpose for identifying the user is to create new identification methods, i.e. for example to create an user account with username and password, then the Service Provider must report such purpose by adding either "weak" (for weak identifiers, for example password account) or "strong" (for strong electronic identification which is only for the officially licensed members of the Finnish Trust Network) to the scopes. Using "weak" or "strong" as a purpose may affect pricing and depends on your contract.
Default scope value in Trivore ID is "openid profile personal_identity_code"
-
Enter "Service provider name" if needed.
Human readable name of the Service Provider the user is authenticating to. The name should identify the service in such a way that the user understands which service they are identifying to. It could for example be either the legal name of the organization or the trade name the user knows the service as. Because the "service provider name" parameter is processed by multiple different identity providers and may be shown on different user interfaces, including mobile apps, we recommend trying to keep the name reasonably short and avoiding unusual characters to make sure the name is displayed consistently.