Setup Tasks for a New Namespace
This page covers the common initial tasks a namespace administrator should complete before using a namespace in production, one larger task per section. The order shown is recommended, but not enforced.
Planning for a new namespace
A namespace's code is meant to be permanent, unlike its descriptive name, which can be changed
at any time. Because of this, it's customary to use a fairly random string for the code (for
example ns1357924680) rather than something derived from the organisation's name.
It's also worth planning how usernames will be assigned. Using a person's name, email address, or phone number as a username is generally discouraged, since none of those are permanent — people change their names, email addresses, and phone numbers, and different people sometimes share the same name. A user account's username can be changed later if needed, so this isn't a critical, unchangeable decision, but it's easier to set a sensible policy up front than to migrate usernames afterward.
Namespace general settings and policies
Before creating many permanent user accounts, review the namespace's general settings — they determine much of its "look and feel." Go to Namespaces, select the namespace, then Configuration → Edit namespace. See Namespaces for a full tour of the editor's tabs; a few decisions worth making early are called out below.
Sign-in name policy (Core tab): we generally recommend using email addresses as sign-in usernames, since users already know their own email address. A user's email address (and so their sign-in name) can still be changed later as part of normal account editing. Enabling this requires two one-time steps:
- List the valid email domains for user accounts in this namespace. The list is presented to
users in the order you enter it, so put the most common domain first. Use
*to allow any domain if the namespace serves the public with no fixed set of domains — otherwise, listing specific domains is recommended for security. If several organisations share this namespace, list all of their domains here. - Set the sign-in name policy dropdown to Email address.
This policy only affects accounts created after the change, which is one more reason to decide it early.
Other settings worth reviewing while you're here:
- User Interface tab — whether to allow nicknames (aliases) instead of official names, and whether users may self-recover forgotten passwords (in high-security environments, this is often disabled).
- Features tab — LDAP and SMS settings. If enabling LDAP authentication, it's usually best to limit it to a specific group of accounts rather than the whole namespace, especially if the namespace has service accounts that must not authenticate via LDAP.
- Branding tab — upload the namespace's logos (PNG, JPEG, or GIF): a top-bar logo, separate sign-in logos for the Management UI and for OpenID Connect, and a general-purpose logo used in places like reports (use a high-resolution version of this one, since reports are often printed). An alternative sign-in address for private sign-in can also be set here.
- Miscellaneous tab — the namespace's binding legal data location. It defaults to whatever the default policy specifies, but can be overridden per Group Policy — obeying this setting normally requires an organisation-private Trivore ID deployment, so contact sales or support before relying on it. Terms and Conditions / Privacy Policy acceptance is configured separately, under User Agreements.
- Personal data tab — configures the email notification sent when a personal data request is submitted for this namespace.
Multi-namespace administrators aren't set from within the editor — from the Namespaces list, select the namespace and use Actions → Manage multi-namespace administrators instead.
See Namespaces for the full tab reference, including tabs not called out above (User identification, Message templates, User registration, and Password Reset).
Setting up the default policy
The namespace's default policy applies to every user account in the namespace, so it's worth reviewing before creating many accounts — especially its security settings.
On the policy's Security tab, the Set NIST SP 800-63-3 recommended values button applies NIST's recommended password settings in one step — longer minimum password length, a bounded maximum age, and sign-in lockout after repeated failures — as a reasonable starting point. Review the resulting values against your own organisation's requirements; see the Group Policies settings reference for what each Security tab field controls.
If the LDAP Server feature is enabled, these security settings are also enforced when signing in via LDAP. Enabling MFA is also advisable.
Create administrator and normal user accounts
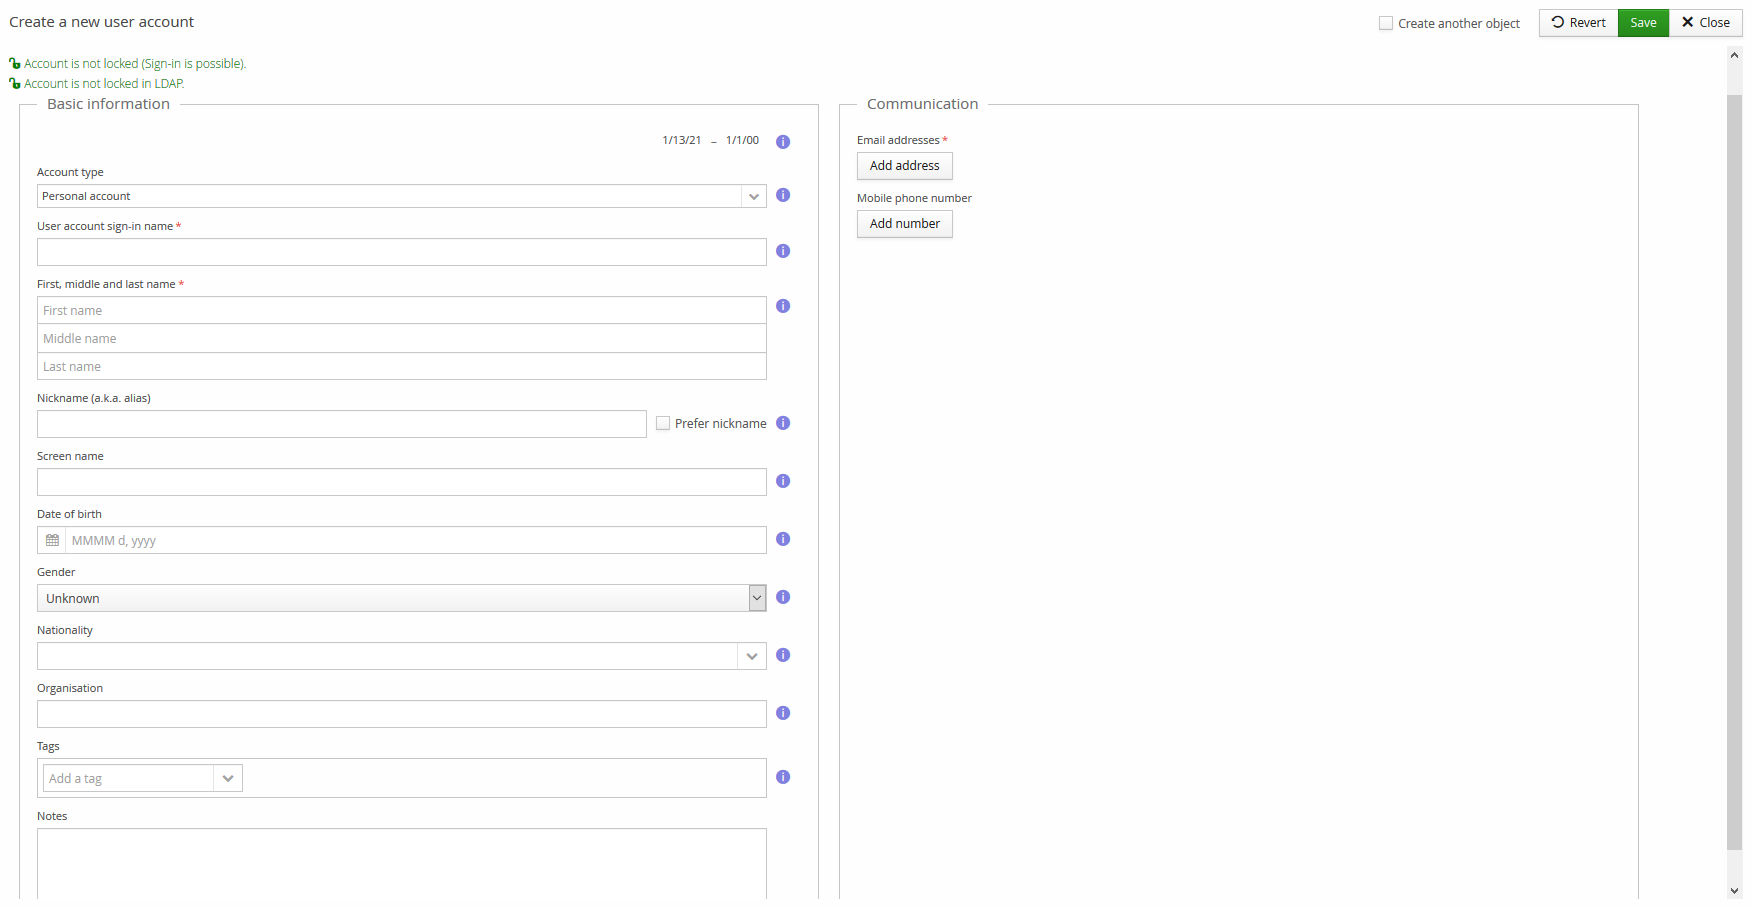
The steps for adding any user account are the same, whether they'll be a namespace administrator or not:
- Sign in as an account with the Account Admin role.
- Go to Accounts and select Add account.
- The Core tab is where the most important information is entered.
- A password isn't entered when creating an account — it's sent directly to the user, using whichever method your policies define for password transmission.
- If you're creating more than one account, check Continue creating new user accounts before saving.
- Select Save, then Close once you're done creating accounts.
It's also possible to import user accounts from a CSV, ODS, XLS, or XLSX file, via the Actions menu — useful when creating many accounts at once.
Namespace administrators
On the Access tab, assign at least the following roles to other namespace administrators:
- Account Admin
- Group Admin
- Group Policy Admin
- Role Admin
- Authorisation Admin
- Namespace Admin
Other admin roles (Location Admin, Contact Admin, Target Admin, and so on) are optional, and typically only one or two accounts in a namespace hold the Role Admin role. Roles tied to optional applications (such as Incident Admin) only matter if that application is in use — assigning them otherwise is harmless, but pointless.
A "normal" user account for testing
It's worth creating at least one account with no particular roles, if only to verify what a non-administrator account can see and do, and to get familiar with Trivore ID as a new administrator. This account is also useful for testing role and Group Policy behavior — delete or lock it once you're done testing.
Create groups in the namespace
Groups let you manage many user accounts together, and exist only within the namespace they're created in.
- Sign in as an account with the Group Admin role.
- Go to Groups and select Add group.
- Enter a name and optional description on the Core tab.
- On the User accounts tab, add the accounts that should be members. The Groups tab lets you nest an existing group inside this one.
- If you're creating more than one group, check Continue creating new groups before saving.
- Select Save, then Close once you're done.
Groups can also be imported from a CSV, ODS, XLS, or XLSX file via the Actions menu, which is worth using when creating many groups at once.