Implementing an OIDC Client for authentication
This section has information on how to set up an OIDC client for authentication.
Selecting the authentication flow
Authentication can follow one of several alternative flows.
| Flow | Typical use cases | Specification |
|---|---|---|
| Authorization Code Flow | Web applications with a backend capable of keeping the client secret secure | OpenID Connect Core 1.0 |
| Implicit Flow | Native applications, Single-page applications | OpenID Connect Core 1.0 |
| Hybrid Flow | Same as Authorization Code | OpenID Connect Core 1.0 |
| Client Credentials Flow | Machine-to-Machine (M2M) applications | |
| Authorization Code Flow with PKCE | Native or Single-page applications unable to secure the client secret | RFC7636 - Proof Key for Code Exchange by OAuth Public Clients |
| Resource Owner Password Flow | (Not recommended) Highly-trusted applications only |
Developers of most applications will select either the Authorization Code Flow (web sites), or the Implicit Flow (mobile apps).
More information about effects of selecting a specific flow is available here.
Authorization Code Flow
The most commonly used grant flow is the Authorisation Code flow. The Authorization Code flow can be used when the client is able to keep the client credentials secure. In this flow, the client is authenticated to Trivore ID by using a Client ID and a Client Secret. This flow is suitable for web applications with a backend.
See OpenID Connect Core 1.0 for reference.
- User selects the Login activity in the App.
- The App opens the authorization endpoint for the User.
- The authorization endpoint directs the User to a Login Prompt.
- The User authenticates using their credentials. The User gives their consent to grant the App access to their information.
- The User is redirected back to the App with an Authorization Code.
- The App makes a backend API call to the Token Endpoint. The call includes the Authorization Code and the Client Credentials.
- The App receives the Access Token and ID Token for the User.
- The App can use the Access Token to act on behalf of the User with many APIs.
- The APIs verify the token and return data to the App.
Authentication Request
GET /openid/auth?
  response_type=code
  &scope=openid%20profile%20email
  &client_id=s6BhdRkqt3
  &state=af0ifjsldkj
  &redirect_uri=https%3A%2F%2Fclient.example.org%2Fcb HTTP/1.1
Host: server.example.com
Successful authentication response
HTTP/1.1 302 Found
Location: https://client.example.org/cb?
  code=SplxlOBeZQQYbYS6WxSbIA
  &state=af0ifjsldkj
Authentication error response
HTTP/1.1 302 Found
Location: https://client.example.org/cb?
  error=invalid_request
  &error_description=
    Unsupported%20response_type%20value
  &state=af0ifjsldkj
Token Request
POST /token HTTP/1.1
Host: server.example.com
Content-Type: application/x-www-form-urlencoded
Authorization: Basic czZCaGRSa3F0MzpnWDFmQmF0M2JW

grant_type=authorization_code&code=SplxlOBeZQQYbYS6WxSbIA
  &redirect_uri=https%3A%2F%2Fclient.example.org%2Fcb
Successful Token Response
HTTP/1.1 200 OK
Content-Type: application/json
Cache-Control: no-store

{
 "access_token": "SlAV32hkKG",
 "token_type": "Bearer",
 "refresh_token": "8xLOxBtZp8",
 "expires_in": 3600,
 "id_token": "eyJhbGciOiJSUzI1NiIsImtpZCI6IjFlOWdkazcifQ.ewogImlzc
   yI6ICJodHRwOi8vc2VydmVyLmV4YW1wbGUuY29tIiwKICJzdWIiOiAiMjQ4Mjg5
   NzYxMDAxIiwKICJhdWQiOiAiczZCaGRSa3F0MyIsCiAibm9uY2UiOiAibi0wUzZ
   fV3pBMk1qIiwKICJleHAiOiAxMzExMjgxOTcwLAogImlhdCI6IDEzMTEyODA5Nz
   AKfQ.ggW8hZ1EuVLuxNuuIJKX_V8a_OMXzR0EHR9R6jgdqrOOF4daGU96Sr_P6q
   Jp6IcmD3HP99Obi1PRs-cwh3LO-p146waJ8IhehcwL7F09JdijmBqkvPeB2T9CJ
   NqeGpe-gccMg4vfKjkM8FcGvnzZUN4_KSP0aAp1tOJ1zZwgjxqGByKHiOtX7Tpd
   QyHE5lcMiKPXfEIQILVq0pc_E2DzL7emopWoaoZTF_m0_N0YzFC6g6EJbOEoRoS
   K5hoDalrcvRYLSrQAZZKflyuVCyixEoV9GfNQC3_osjzw2PAithfubEEBLuVVk4
   XUVrWOLrLl0nx7RkKU8NXNHq-rvKMzqg"
}
Token Error Response
HTTP/1.1 400 Bad Request
Content-Type: application/json
Cache-Control: no-store

{
 "error": "invalid_request"
}
Simplified Python example
from requests_oauthlib import OAuth2Session

# Uncomment to allow use of http instead of https.
# Use http only for testing!
# import os
# os.environ['OAUTHLIB_INSECURE_TRANSPORT'] = '1'


# The client ID and secret obtained from the onePortal platform, replace these
CLIENT_ID = r'3543289205522754'
CLIENT_SECRET = r'change_me'

# The URL where the client is redirected after a successful authentication
# Change to accommodate your setup. This should be something like https://myapp.com/after_login
REDIRECT_URI = 'https://example.com'

# The address of the OpenID Connect Provider (the onePortal platform)
host_address = 'https://fi.trivoreid.com'

# Scopes define the information that your application is requesting access to
# For a complete list of available scopes, please see $host_address/.well-known/openid-configuration
scope = ['email', 'openid', 'profile', 'phone', 'address']

oauth = OAuth2Session(CLIENT_ID, redirect_uri=REDIRECT_URI, scope=scope)

# Generate authorization_url and display it to user:

authorization_url, state = oauth.authorization_url('%s/openid/auth' % host_address)

print('Please go to {} and authorize access.'.format(authorization_url))

# User goes to authorization_url, authenticates, is redirected to callback URL.
# User is asked to paste the callback URL below:

authorization_response = input('Enter the full callback URL')

token = oauth.fetch_token(
    '%s/openid/token' % host_address,
        authorization_response=authorization_response,
        client_secret=CLIENT_SECRET
        )

r = oauth.get('%s/openid/userinfo' % host_address)

print(r.text)
print(r.headers)
Authorization Code Flow with PKCE
The Authorization Code Flow is suitable for clients that can securely maintain the Client Secret. It is therefore not recommended for a public client, such as a native app or a single page webapp. However, those kinds of applications can still use it by using the Proof Key for Code Exchange (PKCE) technique.
The Authorization Code Flow with PKCE differs from the normal Authorization Code Flow in that the Client Credentials are not used, instead the Client generates and passes a Code Verifier and Code Challenge to Trivore ID during Authorization and Token requests.
Code Verifier and Code Challenge
The client creates a code_verifier value for each Authorization Request. The value is a high-entropy cryptographic random String using the characters A-Z, a-z, 0-9, "-", ".", "_", "~", with a minimum length of 43 characters and a maximum length of 128 characters.
The client then creates a code challenge derived from the code verifier using "S256" challenge method:
code_challenge = BASE64URL-ENCODE(SHA256(ASCII(code_verifier)))
Include the Code Challenge with the Authorization Request
The client includes the Code Challenge as part of the Authorization Request using the following additional parameters:
code_challenge- REQUIRED Code challengecode_challenge_method- with valueS256
Send the Code Verifier to the Token Endpoint
After receiving the Authorization Code, the client sends the Access Token Request to the token endpoint. It includes the following parameter in the request:
code_verifier- REQUIRED Code verifier
See RFC7636 for more reference information.
Implicit Flow
With Implicit Flow the client credentials are not used during requests. The application can be a stand-alone Single-page application or a native application. In the Implicit Flow the client receives all tokens directly from the authorization endpoint, without a need to use the Token Endpoint. Refresh tokens are not available with this flow.
See OpenID Connect Core 1.0 for reference.
Authentication request
The authentication request is as in Authorization Code Flow, except for these parameters:
response_type- REQUIRED When using Implicit Flow, this value is eitherid_token tokenorid_token. No Access Token is returned when the value isid_token.redirect_uri- REQUIRED When using Implicit Flow, the Redirection URI MUST NOT use thehttpscheme unless the Client is a native application, in which case the hostname should belocalhostor127.0.0.1or[::1].nonce- REQUIRED Value is passed unmodified from the Authentication Request to the ID Token.
GET /openid/auth?
  response_type=id_token%20token
  &client_id=s6BhdRkqt3
  &redirect_uri=https%3A%2F%2Fclient.example.org%2Fcb
  &scope=openid%20profile
  &state=af0ifjsldkj
  &nonce=n-0S6_WzA2Mj HTTP/1.1
Host: server.example.com
Successful Authentication Response
All response parameters are added to the fragment component of the Redirect URI.
The parameters are:
access_token- OAuth 2.0 Access Token. Returned, unlessresponse_typevalue used isid_tokentoken_type- Value is alwaysBearerid_token- ID Tokenstate- The state value from the Authorization Request.expires_in- Expiration time of the Access Token in seconds since the response was generated
HTTP/1.1 302 Found
Location: https://client.example.org/cb#
  access_token=SlAV32hkKG
  &token_type=bearer
  &id_token=eyJ0 ... NiJ9.eyJ1c ... I6IjIifX0.DeWt4Qu ... ZXso
  &expires_in=3600
  &state=af0ifjsldkj
Hybrid Flow
When using the Hybrid Flow, some tokens are returned from the Authorization Endpoint and others are returned from the Token Endpoint.
The benefit of Hybrid Flow compared to Authorization Code Flow is immediate access to the ID Token. Compared to the Implicit Flow, it also allows a safe retrieval of the Access Token and Refresh token.
See OpenID Connect Core 1.0 for reference.
Resource Owner Password Flow
Using this is not recommended. See Resource Owner Password Flow for an example.
Client Credentials Flow
The Client Credentials Flow is for Machine-to-Machine (M2M) use cases, where the client being used is authenticating itself to another client, instead of an User.
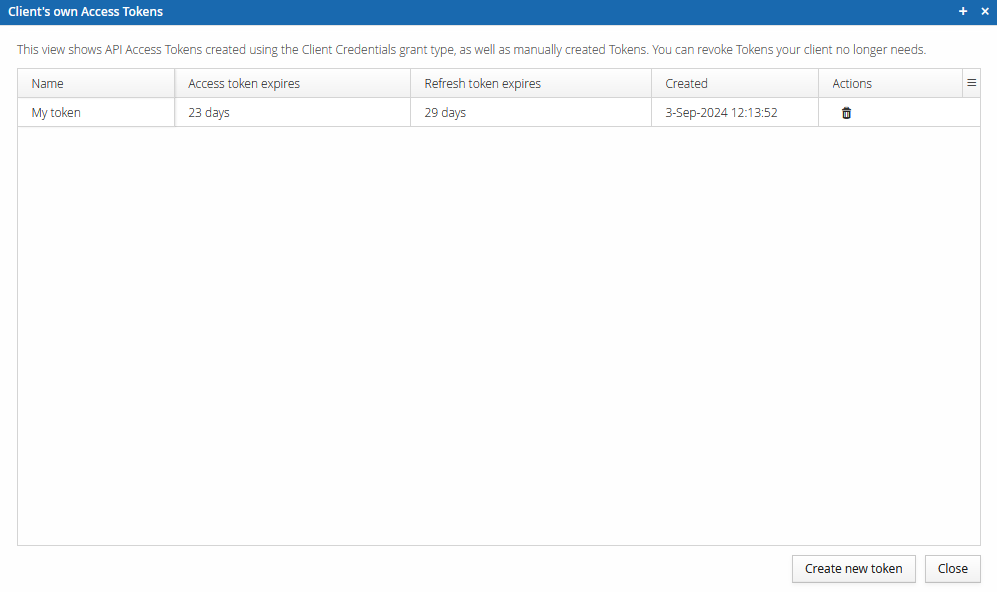
The Access Token can be generated either via the Token Endpoint, or through the management UI.
See Using OIDC Client Credentials to generate an Access Token another service can use to verify your Application for an example.
Requesting via token endpoint
An access token is requested from the Token Endpoint by using the grant_type value client_credentials. Authenticate using Basic Auth or the client_id and client_secret parameters.
POST /token HTTP/1.1
Host: server.example.com
Content-Type: application/x-www-form-urlencoded
Authorization: Basic czZCaGRSa3F0MzpnWDFmQmF0M2JW

grant_type=client_credentials
Generating through the UI
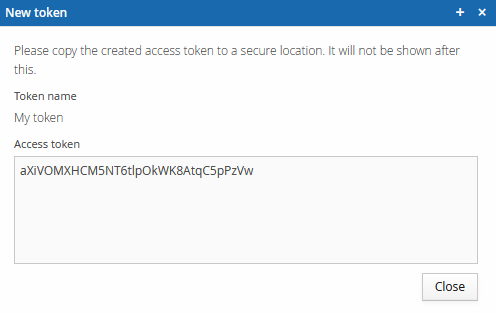
Client Credential Tokens can be created in the Management UI, through the OpenID Connect view. Select your client, click the Tokens button, and configure the token.

You can name the token as your wish, and you can configure the expiration time. Some applications require that there is an expiration time.

You can also manually invalidate tokens in this view.